6 years ago3074 Views0 Down18 Likes0 !
 Wall
Wall
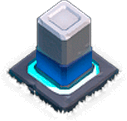
Walls are great for keeping your village safe and your enemies in the line of fire.

Walls are great for keeping your village safe and your enemies in the line of fire.
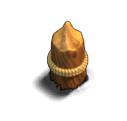
Level 1
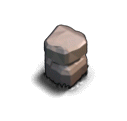
Level 2
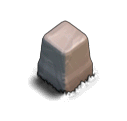
Level 3
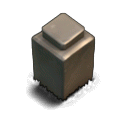
Level 4
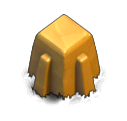
Level 5

Level 6

Level 7
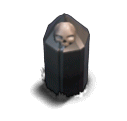
Level 8
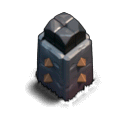
Level 9
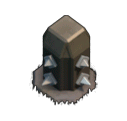
Level 10
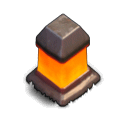
Level 11
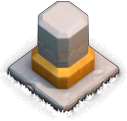
Level 12

Level 13

Level 14
Stats
| size on board |
|---|
| 1x1 |
Levels
| Level | build cost gold | cumulative cost gold | build cost elixir | cumulative cost elixir | magic cost | hitpoints | town hall level required |
|---|---|---|---|---|---|---|---|
| 1 | 50 | 50 | N/A | N/A | N/A | 300 | 2 |
| 2 | 1,000 | 1,050 | N/A | N/A | 1 | 500 | 2 |
| 3 | 5,000 | 6,050 | N/A | N/A | 1 | 700 | 3 |
| 4 | 10,000 | 16,050 | N/A | N/A | 1 | 900 | 4 |
| 5 | 25,000 | 41,050 | N/A | N/A | 1 | 1,400 | 5 |
| 6 | 50,000 | 91,050 | N/A | N/A | 1 | 2,000 | 6 |
| 7 | 100,000 | 191,050 | N/A | N/A | 1 | 2,500 | 7 |
| 8 | 250,000 | 441,050 | N/A | N/A | 1 | 3,000 | 8 |
| 9 | 500,000 | 941,050 | 500,000 | 500,000 | 1 | 4,000 | 9 |
| 10 | 1,000,000 | 1,941,050 | 1,000,000 | 1,500,000 | 1 | 5,500 | 9 |
| 11 | 2,000,000 | 3,941,050 | 2,000,000 | 3,500,000 | 2 | 7,000 | 10 |
| 12 | 4,000,000 | 7,941,050 | 4,000,000 | 7,500,000 | 4 | 8,500 | 11 |
| 13 | 5,000,000 | 12,941,050 | 5,000,000 | 12,500,000 | 5 | 10,000 | 12 |
| 14 | 6,000,000 | 18,941,050 | 6,000,000 | 18,500,000 | 6 | 11,500 | 13 |
Wallpapers of Wall
6 years ago2835 Views2 Down9 Likes0 !
6 years ago4488 Views649 Down19 Likes2 !
6 years ago4360 Views668 Down15 Likes2 !
6 years ago2726 Views309 Down14 Likes1 !
6 years ago2362 Views179 Down8 Likes0 !
6 years ago5177 Views1006 Down14 Likes1 !
SUMMARY
- Wall placement is a key point in designing a well-defended village. Walls are the main fortification for defense and are capable of withstanding a great deal of damage from attacking enemies. However, the effectiveness of Walls is greatly lowered if they are not constructed to completely enclose the structures they are designed to protect. Any gaps in the continuation of the Wall structure will render it useless, as enemy troops will simply walk through the broken area. The greatest threats to walls are Earthquake Spells and Wall Breakers.
- An exception to this rule is the funneling strategy, where a player deliberately leaves a gap in order to group troops together and subsequently take them out using the splash damage of defensive units such as Mortars or Wizard Towers. Alternatively (or additionally) you intruders can be caught off-guard by filling the openings with traps such as Bombs or Spring Traps.
- Walls block all ground units with the exception of Hog Riders, Miners and the Grand Warden. The use of Jump Spells allow ground units to bypass walls.
- Walls can be bypassed entirely by air units such as Balloons, Dragons, Minions and Lava Hounds.
- Wall Breakers immediately target Walls upon deployment, inflicting 40x normal damage to them, but also blow themselves up in the process. The holes created by Wall Breakers allow ground units to gain access to buildings within the Walls, making Wall Breakers the ideal troop for getting past Walls.
- If there are 2 layers of Walls, the Wall Breaker's blast radius will affect both layers.
OFFENSIVE STRATEGY
- Look for gaps or Wall segments that are lower levels than others. Also look for areas within Walls where people have positioned their buildings poorly. Be careful, however, as gaps can often be intentional and may contain Traps or Hidden Teslas. Make good use of Wall Breakers to penetrate Walls quickly. Attack Walls that are out of range of defenses, if possible.
- Spiking will no longer work, so you can avoid decoys and distractions.
- Once a section of a Wall is breached, Wall Breakers will ignore that section and attempt to find the next closest Wall that encloses a building. That section may or may not be behind the breached section.
- 4 Earthquake Spells, regardless of their level can take down any level of Walls.
- By using air troops, Jump Spells, Hog Riders as well as Miners and the Grand Warden, you can avoid having to destroy walls.
- Note: It is not recommended to use Jump Spells with Hog Riders, as they will ignore the spell and jump over walls anyway.
DEFENSIVE STRATEGY
- The main purpose of Walls is to hinder attacking ground (i.e. non-flying) troops, allowing defenses to damage and kill attackers as they attempt to breach the Walls. Once breaches occur, the attacking troops have free rein to destroy the defenses and other buildings within the Walls. Therefore, when designing a defense, it is crucial that players do not to attempt to envelop their entire village within one big Wall. Instead, it is recommended that players design their Walls in layers or cells so that ground troops have to break through multiple Walls to attack the entirety of the village, while also providing the defenses more opportunity to repel the attack. Note that with this strategy there will inevitably be buildings that cannot be placed within the Walls; that is entirely normal and can even be used to your advantage by placing non-defensive and non-resource buildings such as Builder's Huts, Army Camps and Laboratories immediately outside the Walls to act as another layer for enemy Troops to fight through.
- If a defender uses a double-walled design, Wall Breakers can hit the inner Walls as well. This is because the unit's bomb inflicts damage to everything within a small radius of its detonation (area attack).
- Attacking Archers and Wizards are capable of shooting over Walls and attacking the structures behind them. Defenders can use less-important buildings as a "buffer", delaying these ranged units' attacks on more important buildings. In this case, make sure that long-ranged defenses are within range and have ample opportunity to retaliate before these buffer buildings are completely destroyed and the attackers can advance to the Wall.
- The defensive territory in which an attacker is not permitted to spawn Troops is shown in a white overlay after any building has been moved. An attacking player may be able to spawn Troops behind the Walls if any area gaps exist in this territory. Since every structure has an additional one square perimeter around which troops cannot be spawned, avoid gaps of greater than two squares to prevent this from happening. Traps, decorations, obstacles and Hidden Teslas are exceptions and do not increase the defender's territory.
- An outdated practice is to use single standing Wall struts or spikes to lure Wall Breakers; however, this spiking tactic no longer works, as Wall Breakers will only target Walls that are two or more consecutive segments. This technique can, however, be used to extend the defender's territory, and thus the outer perimeter of where attackers may spawn troops.
- Wall Breakers only target Walls that completely or partially enclose buildings; they will ignore empty compartments and spikes (unless there are no other targets left).
- A common mistake among beginners is the attempting to "close" Wall gaps with buildings, rocks, trees, decorations, etc. This does not work; Troops can walk right through the gap as though the obstacles weren't there. Only continuous Wall segments will deter ground troops.
- Another common mistake made by new players is attempting to use the edges of the map as barriers, thinking that this will allow them to construct Walls on only two or three sides. This also is ineffective, as enemy Troops can always be spawned on the darker grass area surrounding the village, even though buildings cannot be placed there by the player.
- Players should have Walls around the Town Hall, defensive buildings, and Gold/Elixir Storages rather than Army Camps, Barracks, Spell Factory, Laboratory, or Builder's Huts because damage to the latter buildings are relatively inconsequential. This applies particularly if your Town Hall level is low and resources are limited.
UPGRADE DIFFERENCES
- Level 1 Walls resemble wooden fences with rope tied around the posts.
- Level 2 Walls are changed into uncut rock.
- Level 3 Walls are more smooth and cut stone Walls.
- Level 4 Walls are changed to solid iron and become taller.
- Level 5 Walls are carved gold.
- Level 6 Walls become a tall elixir-colored pointy crystal.
- Level 7 Walls are taller and much sharper. They are dark purple in color.
- Level 8 Walls are a thick, dull, black crystal with a skull on top. When joined at a corner (specifically when it is at least part of a "V" pattern), the skull looks bigger and the holes of the skull are darker.
- Level 9 Walls have spikes on the sides of the Wall and have fires burning atop them when joined in a corner.
- Level 10 Walls have strips of lava flowing in a clear pipe on top and have waves of fire going through intermittently. When joined at a corner, they have a permanent flame on top of them.
- Level 11 Walls have lava on their sides and have waves of lava flowing through them intermittently. When joined at a corner, they have the same lava faucet as the ones on the side of the level 10 Town Hall.
- Level 12 Walls are white on the top and golden on the bottom, and have waves of golden lights shining through them intermittently.
- Level 13 Walls are white and blue with a gray metallic bottom and springs connecting each segment, and have waves of electrical energy flowing through them intermittently.
- If a Wall segment contains level 10 through 13 Walls, the four types of glowing effects will be continuous on all of them. If the Wall segment also contains lower level Walls, the glowing effect will pause on the lower level Walls, then continue onto the higher level Walls.
TRIVIA
- There is an Achievement called Wall Buster that advances when you destroy a certain amount of walls.
- Thus far, Level 13 Walls are the structures with the greatest amount of hitpoints in the game, having 10,000 hitpoints.
- Walls will not be targeted by air troops, but they can be destroyed by them through indirect means (a very common example is Balloons can attack buildings and destroy nearby Walls by splash damage, and a rare example is Dragons can attack Clan Castle troops that are near Walls and destroy the Walls).
- Occasionally two Wall segments will appear not to be connected, although they really are. This usually happens in the Village Edit Mode.
- The 16 Sept 2014 update added the ability for multiple Walls to be upgraded at once, and provided the capability for Level 7 and above Walls to be upgraded with Elixir at the same cost as it would take to upgrade the same Wall with Gold.
- Walls overall are one of the most expensive defenses to upgrade in the game, as the final upgrade of just one Wall costs 5,000,000 Gold or Elixir. In total, upgrading all 300 available Walls from level 11 to level 12 cost up to 1,200,000,000 Gold or Elixir.
- If you use gems (to purchase gold/elixir) for building all walls from scratch, it will cost you 673,895 gems (worth USD$4,813.06).
- The 11 Dec 2014 update restricted the capability for Walls to be upgraded with Elixir until the Wall is being upgraded to level 9 and above. In order to upgrade an entire row of Walls using Elixir, all pieces in the selected Wall must be at least level 8 or up. If there are any selected pieces of Wall in the row that are at level 7 or lower, the game will only offer to upgrade the row with Gold until those lower-level pieces have been upgraded to level 8.
- Walls only had 8 levels during the global launch in 2012, the other levels were added later on:
- Levels 9 and 10 were added with the January 2013 update.
- Level 11 was added with the June 2013 update.
- Level 12 was added with the December 2016 update. This same update also reduced the costs of level 10 and 11 walls.
- Level 13 was added with the Town Hall 12 update. This same update also reduced the costs of level 5-11 walls.
- The 30 April 2015 update changed the original cost of 200 Gold per wall to 50 Gold per wall.
- The 17 September 2015 update changed the look of level 11 walls.
- There are also texture changes on Wall levels 2-8 except the 4th level.
- Prior to this update, there used to be a different texture, which was aqua with electric sparks.
- As of the 24 May 2016 update, the destroyed walls appearances are different for every level.
Icon Des
| | Tapping this icon displays information about the Wall, such as Level and Hitpoints. |
| | Tapping this icon begins upgrading the Walls/Home Village to the next level, if you have enough resources and a free Builder. When the Walls/Home Village is at maximum level, this icon is not shown. |
| | Tapping this icon upgrades the Wall to the next level, if you have enough Wall Rings and a free Builder. When the Wall is at maximum level, this icon is not shown. |
| | Tapping this icon selects a row of Walls to move or rotate instead of a single Wall. The longest contiguous row of Walls will be selected. |
| | Tapping this icon rotates the selected row of Walls. This icon is only displayed while you have multiple Walls selected. |
| | Tapping this icon upgrades all the upgradable Walls in the selected row to the next level, if you have enough resources and a free Builder. This icon is only displayed while you have multiple Walls selected. |
All Units
| ARMY | • Builder Barracks • Star Laboratory • Battle Machine Altar • Army Camp |
| DEFENSE | • Double Cannon • Crusher • Archer Tower • Roaster • Guard Post • Cannon • Giant Cannon • Firecrackers • Multi Mortar • Hidden Tesla • Wall • Air Bombs • Mega Tesla • Lava Launcher |
| HEROES | • Battle Machine |
| RESOURCES | • Gold Mine • Gold Storage • Builder Hall • Elixir Storage • Elixir Collector • Clock Tower • Gem Mine |
| TRAPS | • Push Trap • Mega Mine • Mine • Spring Trap |
| TROOPS | • Baby Dragon • Raged Barbarian • Bomber • Night Witch/Bat • Sneaky Archer • Drop Ship • Beta Minion • Night Witch • Boxer Giant • Super P.E.K.K.A • Cannon Cart • Drop Ship/Skeleton • Hog Glider |
| BOOKS | • Book of Fighting • Book of Everything • Book of Building • Book of Heroes • Book of Spells |
| POTIONS | • Builder Potion • Power Potion • Clock Tower Potion • Training Potion • Resource Potion |
| RUNES | • Rune of Dark Elixir • Rune of Builder Gold • Rune of Elixir • Rune of Gold • Rune of Builder Elixir |
| RINGS | • Wall Ring |
| HAMMERS | • Hammer of Fighting • Hammer of Building • Hammer of Heroes • Hammer of Spells |
| SPELLS | • Santa's Surprise • Birthday Boom |
| TRAPS | • Freeze Trap • Shrink Trap • Santa Strike • Pumpkin Bomb |
| TROOPS | • Pumpkin Barbarian • Giant Skeleton • Battle Ram • El Primo • Ice Wizard • Skeleton Barrel |


