5 years ago4285 Views391 Down3 Likes1 !
 Giant Bomb
When you're looking for a Big Boom, you need the Giant Bomb.

When you're looking for a Big Boom, you need the Giant Bomb.
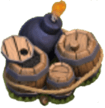
Level 1_2
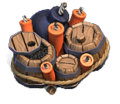
Level 3_4
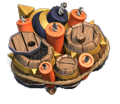
Level 5_6
Stats
| size on board | damage type | trigger radius | unit type targeted |
|---|
| 2x2 | Area Splash | 2 tiles | Ground |
Levels
| Level | damage | damage radius | build cost | build time | experience gained | town hall level required |
|---|---|---|---|---|---|---|
| 1 | 175 | 3 tiles | 12,500 | N/A | 0 | 6 |
| 2 | 200 | 3.5 tiles | 75,000 | 6h | 146 | 6 |
| 3 | 225 | 3.5 tiles | 750,000 | 1d | 293 | 8 |
| 4 | 250 | 4 tiles | 2,500,000 | 3d | 509 | 10 |
| 5 | 275 | 4 tiles | 3,500,000 | 5d | 657 | 11 |
| 6 | 325 | 4 tiles | 5,000,000 | 7d | 777 | 13 |
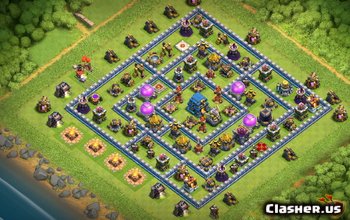
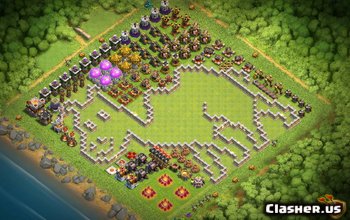
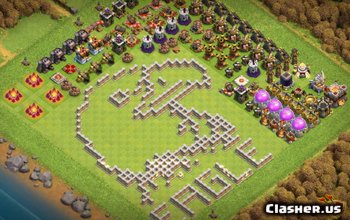
Wallpapers of Giant Bomb
5 years ago4079 Views559 Down13 Likes1 !
SUMMARY
- The Giant Bomb explodes when an enemy comes into proximity. It is essentially a much more powerful (and expensive) version of the Bomb. This deals splash damage to all enemies within a 3-4 tile radius, depending on the Giant Bomb's level.
- Once activated, traps must be re-armed in order to be a part of the next defensive Layout.
- Giant Bombs of all levels deal enough damage to instantly destroy all low-health troops, regardless of their level.
OFFENSIVE STRATEGY
- Try to trigger them with a single Barbarian if you can; drop them one by one near 2x2 spaces in an attempt to trigger them as to prevent further losses in your army.
- Use a Healing Spell to heal your remaining troops, especially if you're a lower level using Giant attacking strategy after they trigger a Giant Bomb.
- When you see a Giant Bomb about to explode don't deploy more troop near it as they will explode too, because the Giant Bomb has a time between when it explodes.
- Try using a hero or a troop with lots of hitpoints such as a P.E.K.K.A or Golem to trigger the Giant Bomb as they will not take much damage to them.
- Don't use your hero's ability other than the Grand Warden's when they trigger a Giant Bomb as they will blow up the summoned troops.
DEFENSIVE STRATEGY
- If you love using Giant Bombs and you want to get a good amount of troops with it, place it where you commonly see a large amount of troops deployed when you are being attacked.
- A Giant Bomb takes up the same amount of space (2x2) as a Hidden Tesla. If you have multiple places where your Hidden Teslas could spawn, placing Giant Bombs in the others can be an effective strategy. Your enemy may decide that the area is safe once they do not trigger a Hidden Tesla, then spawn additional Troops which will all be blown up by the Giant Bomb. Unarmed
- Be cautious when upgrading the Giant Bomb, as this will reveal its location to future attackers. Combat this by relocating it during the upgrade period. As with any other trap, Giant Bombs cannot be triggered during an upgrade.
- Some players place their Giant Bombs on the outside of their bases, to ensure that troops will trigger them early, helping to prevent 50% destruction. The best place to put outside Giant Bombs is behind external buildings but in front of external walls. This ensures that troops will get grouped up while destroying the external building, after which the bomb triggers, destroying many troops at once.
- Other players prefer to place the Giant Bomb further into their bases to act as a trap for Hog Rider and Giant groups. Placing them between two Defensive Buildings ensures that the Giants and Hog Riders will be closely grouped before triggering the bomb.
UPGRADE DIFFERENCES
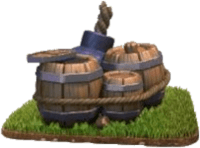
- When first placed, the Giant Bomb consists of a single big Bomb tied together to three barrels of gunpowder with a single round of rope.
- At level 3, several sticks of dynamite are placed between the barrels of gunpowder.
- At level 5, the big bomb gets golden rings and spikes to resemble a level 7 Bomb, and the barrels of gunpowder also gains golden rings with spikes.
TRIVIA
- When the Giant Bomb explodes, it leaves a black scorched mark in the grass, similar to the Bomb. However, the scorch mark lasts for about 1 minute and 40 seconds, compared to that of the Bomb, which lasts only a few seconds.
- The level 2 and 4 upgrades increase its explosion radius but don't change its visual appearance. In contrast, the level 3 and 5 upgrades change its visual appearance but don't increase its explosion radius.
- During the time period in between the 3/7/14 and 12/10/16 updates, Giant Bombs did 1.5x the damage to Hog Riders.
- The Giant Bomb and the Bomb under the Bomb Tower have similar components, and do similar area damage as well.
Icon Des
| | Tapping this icon displays information about the Giant Bomb, such as Level, Re-arm cost, Damage Type and Targets. |
| | Tapping this icon begins upgrading the Giant Bomb to the next level, if you have enough resources and a free Builder. When the Giant Bomb is at maximum level, this icon is not shown. |
| | Tapping this icon instantly upgrades the Giant Bomb to the next level, at the cost of one Hammer of Building if you have one. When the Giant Bomb is at maximum level, this icon is not shown. |
| | Tapping this icon, which is displayed only while an upgrade is in progress, instantly finishes that upgrade at the cost of the displayed number of Gems. |
| | Tapping this icon, which is displayed only while an upgrade is in progress, instantly finishes that upgrade at the cost of one Book of Building. This icon is only shown if you have at least one Book of Building. |
| | Tapping this icon, which is displayed only while an upgrade is in progress, instantly finishes that upgrade at the cost of one Book of Everything. This icon is only shown if you have at least one Book of Everything but do not have a Book of Building. |
| | Tapping this icon, which is displayed only while an upgrade is in progress, boosts all your Builders for 1 hour by a factor of ten, at the cost of one Builder Potion. This icon is only shown if you have at least one Builder Potion. |
| | Tapping this icon, which is displayed only while an upgrade is in progress, cancels the current upgrade and refunds half of the upgrade cost. |
| | Tapping this icon re-arms this Giant Bomb. This icon is only displayed after this Giant Bomb has been triggered during an enemy attack. |
| | Tapping this icon re-arms all Traps. This icon is only displayed when one or more of your Traps have been triggered in a previous enemy attack. |
| | This icon informs you that all Traps are armed. It is not tappable, and replaces the re-arm icons. |
All Units
| ARMY | • Builder Barracks • Star Laboratory • Battle Machine Altar • Army Camp |
| DEFENSE | • Double Cannon • Crusher • Archer Tower • Roaster • Guard Post • Cannon • Giant Cannon • Firecrackers • Multi Mortar • Hidden Tesla • Wall • Air Bombs • Mega Tesla • Lava Launcher |
| HEROES | • Battle Machine |
| RESOURCES | • Gold Mine • Gold Storage • Builder Hall • Elixir Storage • Elixir Collector • Clock Tower • Gem Mine |
| TRAPS | • Push Trap • Mega Mine • Mine • Spring Trap |
| TROOPS | • Baby Dragon • Raged Barbarian • Bomber • Night Witch/Bat • Sneaky Archer • Drop Ship • Beta Minion • Night Witch • Boxer Giant • Super P.E.K.K.A • Cannon Cart • Drop Ship/Skeleton • Hog Glider |
| BOOKS | • Book of Fighting • Book of Everything • Book of Building • Book of Heroes • Book of Spells |
| POTIONS | • Builder Potion • Power Potion • Clock Tower Potion • Training Potion • Resource Potion |
| RUNES | • Rune of Dark Elixir • Rune of Builder Gold • Rune of Elixir • Rune of Gold • Rune of Builder Elixir |
| RINGS | • Wall Ring |
| HAMMERS | • Hammer of Fighting • Hammer of Building • Hammer of Heroes • Hammer of Spells |
| SPELLS | • Santa's Surprise • Birthday Boom |
| TRAPS | • Freeze Trap • Shrink Trap • Santa Strike • Pumpkin Bomb |
| TROOPS | • Pumpkin Barbarian • Giant Skeleton • Battle Ram • El Primo • Ice Wizard • Skeleton Barrel |


